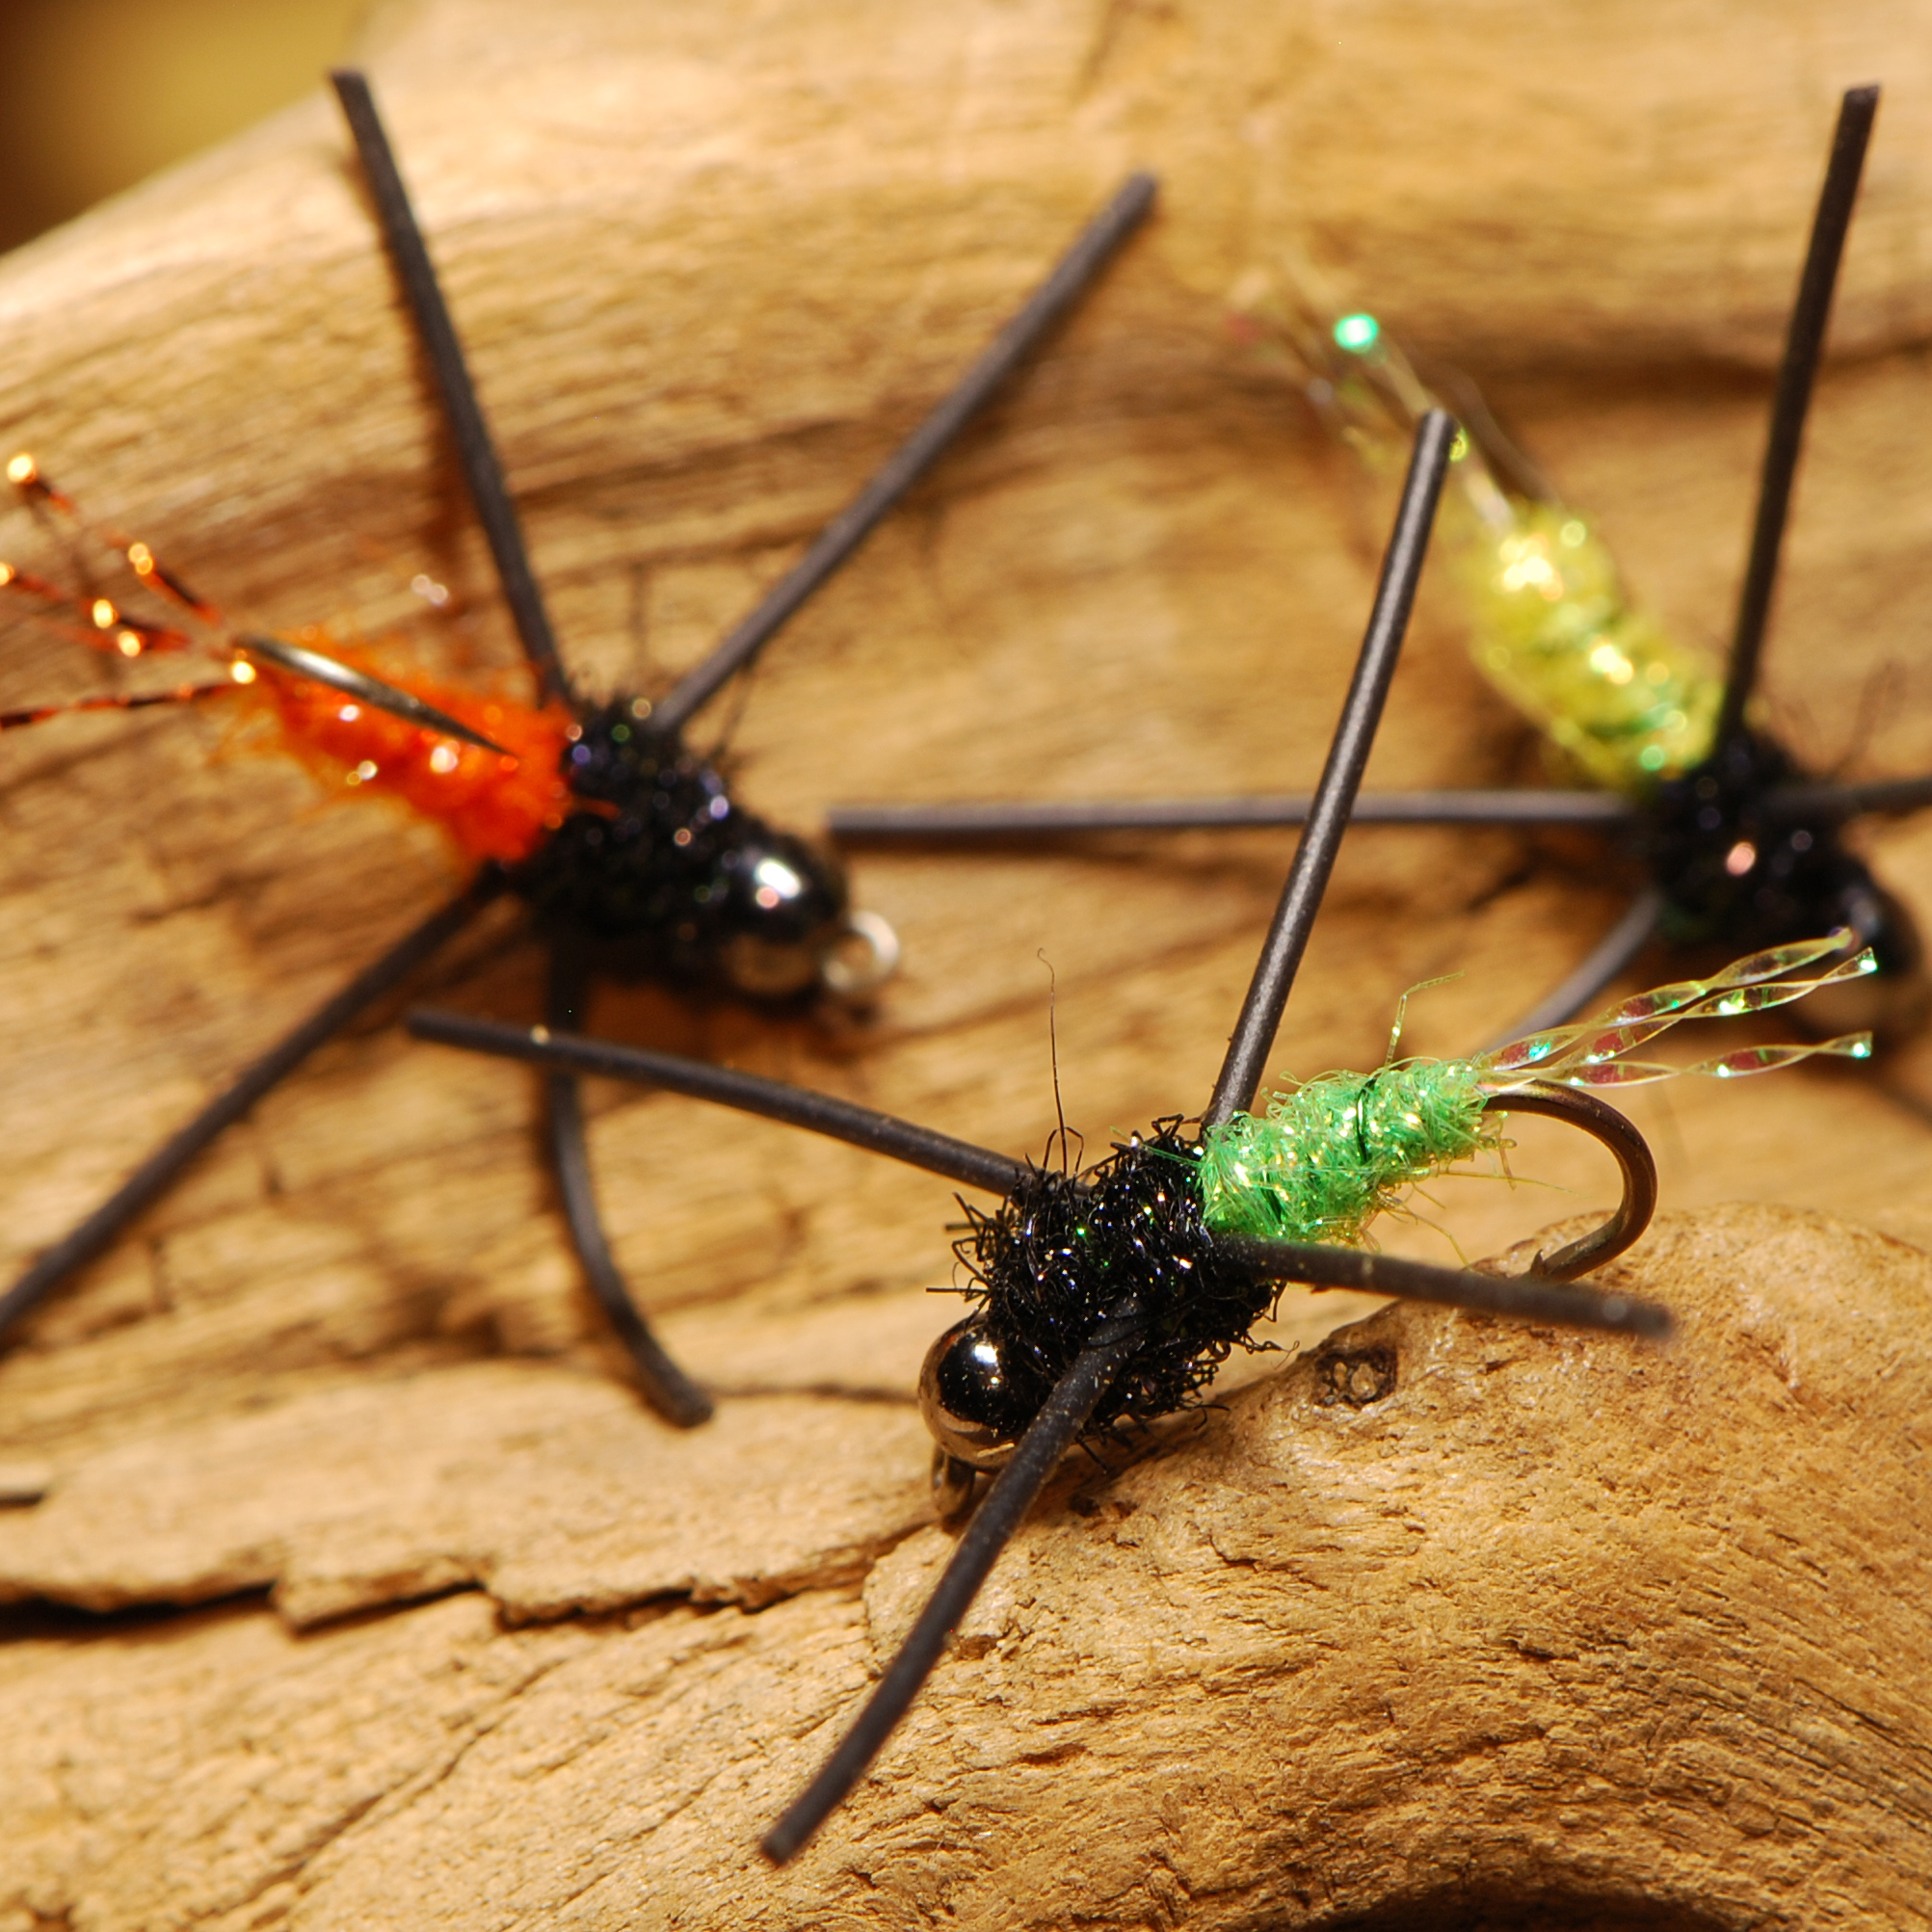
This week’s submission comes from Freddy Block. Fred’s Flash Tail Panfish Nymph has rubber legs and a little bit of bling which should drive bluegills and other panfish crazy. I have added a few to my box this year and I think you should too!
Freddy writes…
“Having summer panfish on my mind, I tied these nymphs to go at them with bright colors, flash, and lots of movement. Between the three Ice Dub color choices, those long rubber legs, and the flashy tails, I believe these are a promising addition to every warm water angler's flybox.
The flies in the image were tied in size 14 and are weighted so they can be fished easily through the entire water column. I chose a brass bead over tungsten to slow the sink rate but to allow them to get down deep if they're not hammered beforehand.”
If you want to see more of Fred’s work check him out on Instagram @freddysflies!
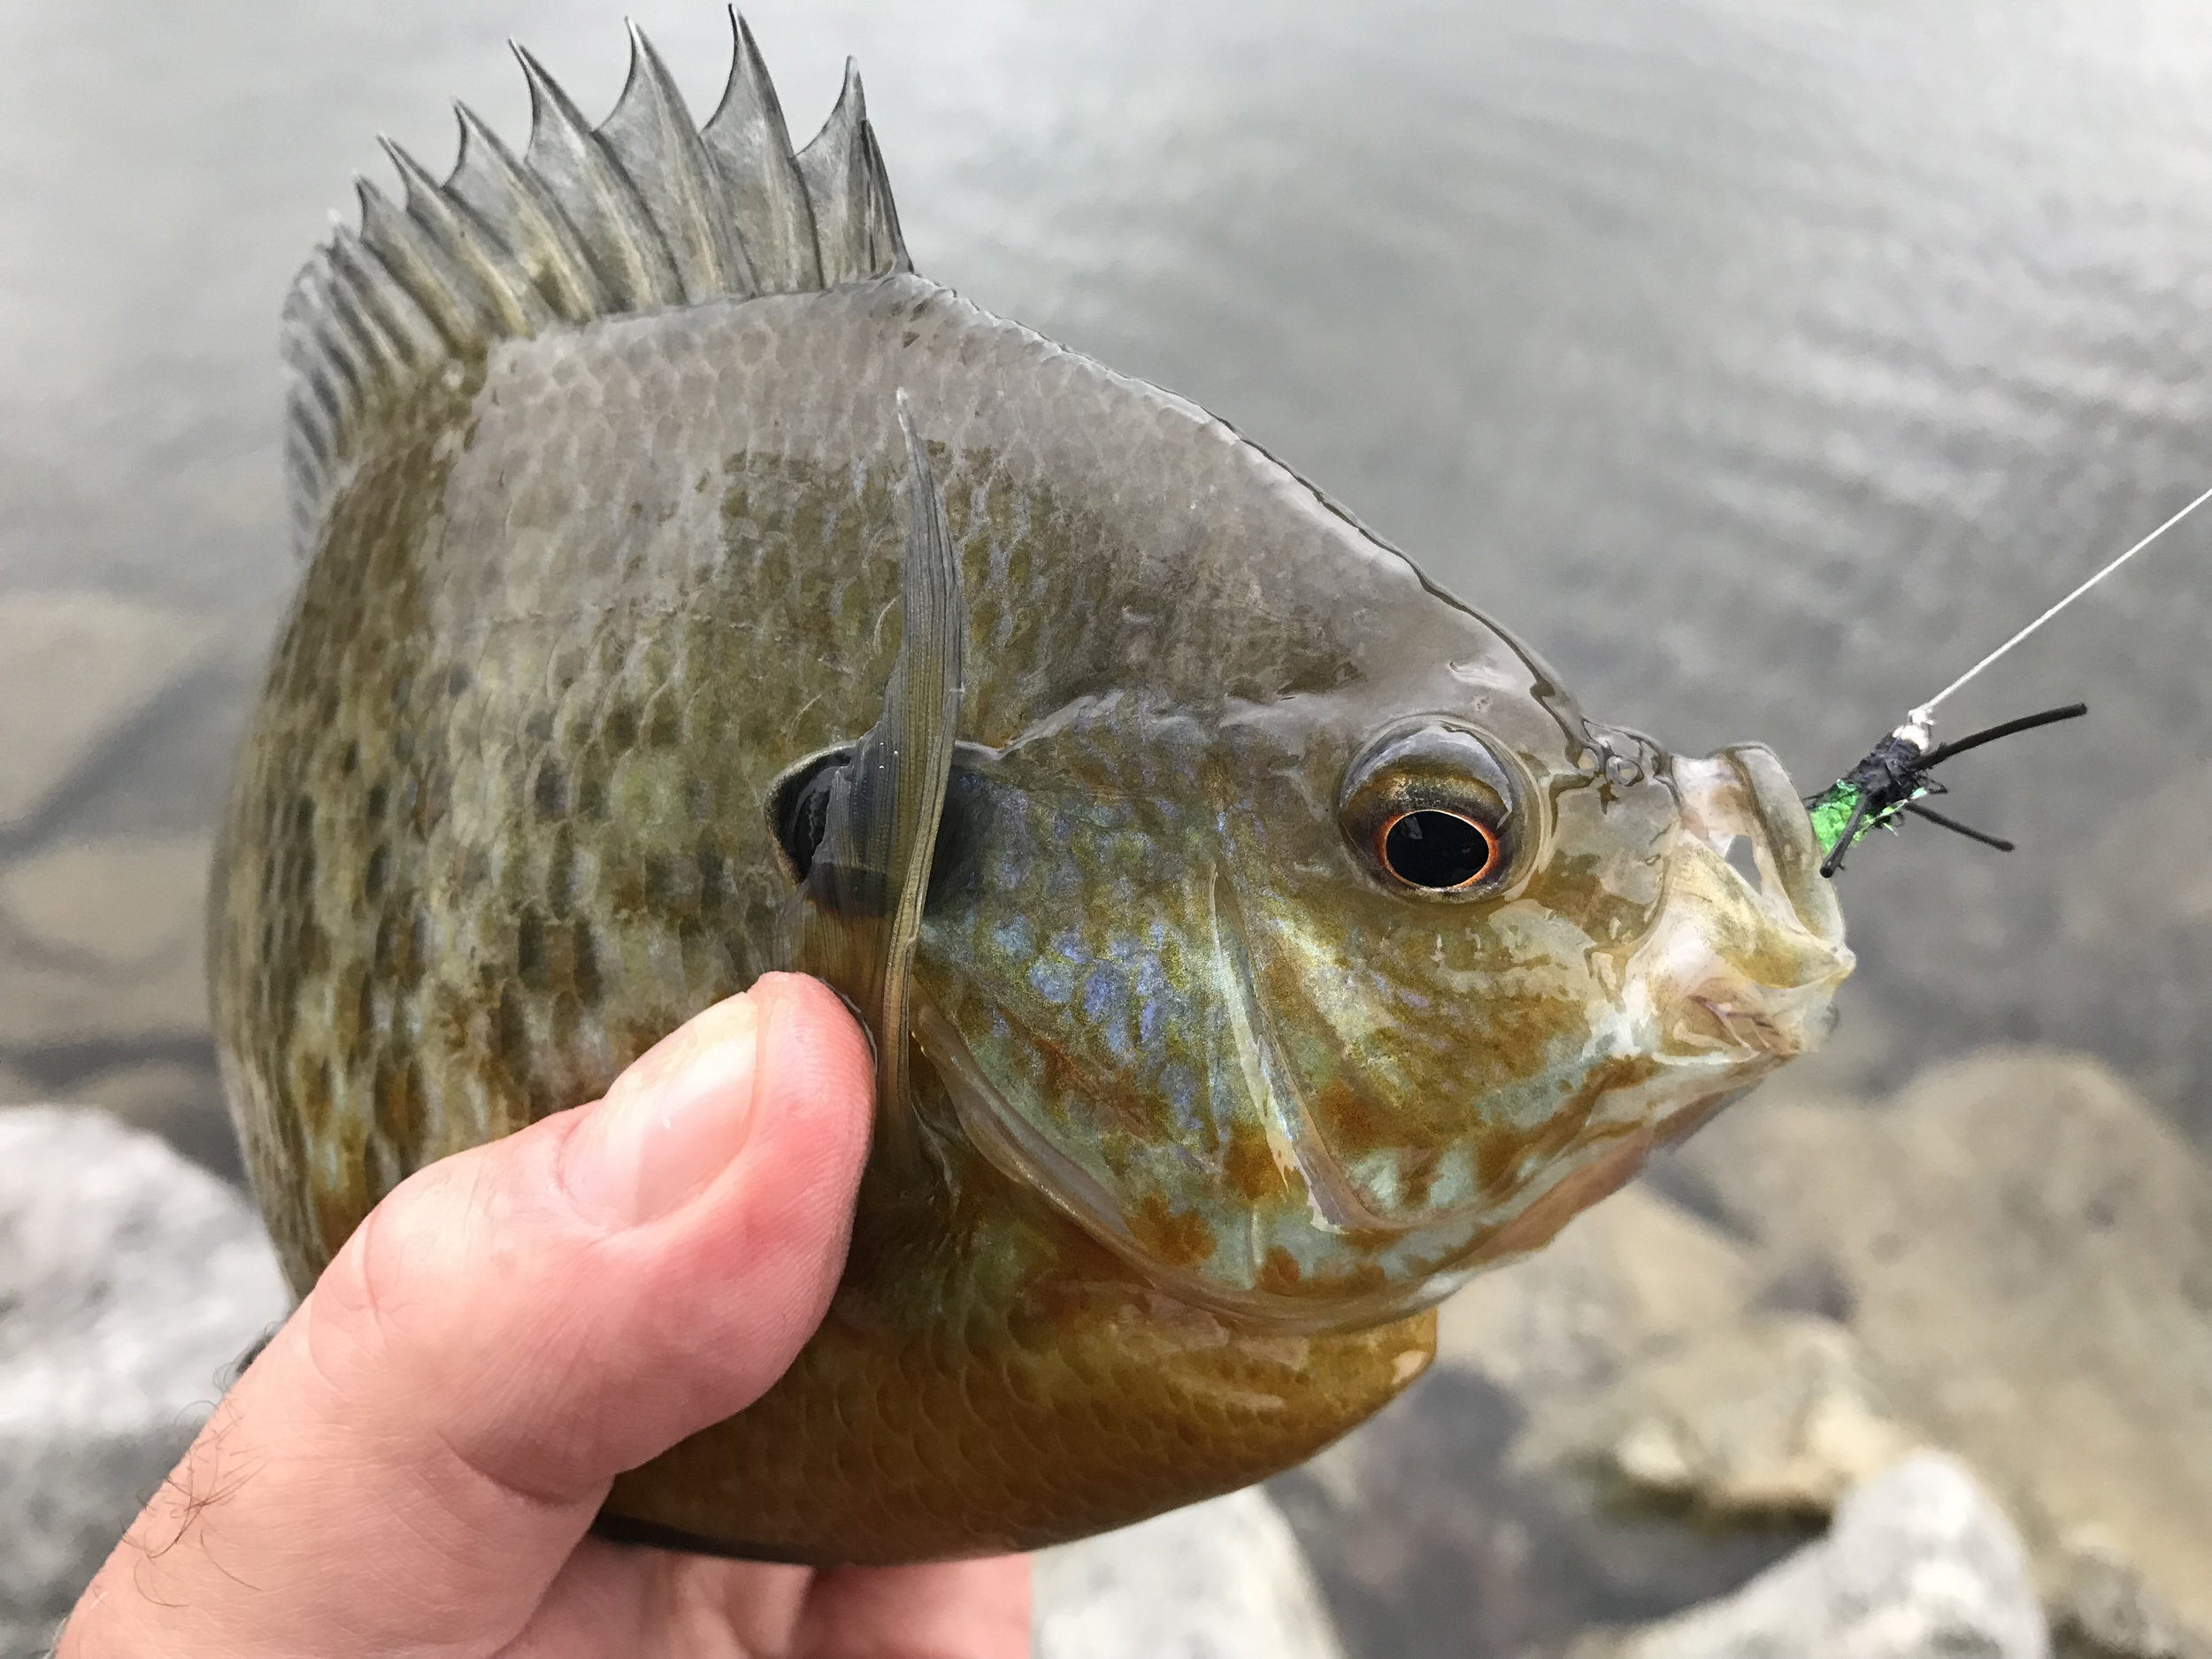
The Flash Tail at work!
PATTERN RECIPE:
Hook: Size 14; 2X-heavy, 2X-long Nymph/Wet Fly (Dai-Riki 730; Daiichi 1710; Tiemco 5262; Mustad 9671)
Bead: 7/64" Brass (Black Nickel)
Weight: .015" non-lead wire [6-8 wraps]
Thread: UTC 70 (Black)
Tail: Krystal Flash (see "Color Combinations" below)
Abdomen: Ice Dub (see "Color Combinations" below)
Thorax: Ice Dub UV Black
Legs: Black rubber (Material was harvested from Walmart purchased spinner-baits for $1 USD ea. but any legs will be fine if the wiggle well!)
COLOR COMBINATIONS
Ice Dub UV Hot Orange & Krystal Flash (Fl. Fire Orange)
Ice Dub Chartreuse & Krystal Flash (Peacock/Pearl)
Ice Dub Hot Yellow & Krystal Flash (Olive)
INSTRUCTIONS
1. Add the bead to the hook and mount hook into your vice.
2. Wrap the wire onto the hook shank and then snug it up into the bead to push and center the bead toward the eye.
3. Start the thread behind the bead and wrap back to where the hook bend begins; then wrap back toward the bead until the thread is at the half-way point on the shank.
4. Tie in 4 strands of Krystal Flash keeping the material on top of the hook shank; wrap back to the hook bend. Trim the tail so it's just about a hook shank in length.
5. Dub the abdomen of the fly to be about 2/3 of the hook shank.
6. Now dub a sparse but tight thorax to the bead (leave room whip finishing).
7. Cut 2 lengths of the leg material. Each length should equal a finished leg length x2 (plus a little extra to be trimmed later to suit).
8. Put the material for one pair of legs (i.e., for one side of the fly) around the thread and get the two ends of it in your fingertips. Pull the legs away from the thread to stretch the material slightly and work it with the tying thread to position it on the side of the fly and near the back of the thorax. When you are happy with the placement, put a about 3 tight wraps around those legs to lock them down. Repeat the process to tie in the other pair of legs onto the opposite side of the fly.
9. Add more black dubbing to the thread and complete the thorax. As you dub the thorax (behind the legs and between them), be sure to get those legs positioned properly and ultimately, get the thread up to behind the bead.
10.Whip finish.
11.Trim the legs to even them; length is up to you.
12.Go fishing!