Sub Surface Patterns

Freddy's Flash Tail Panfish Nymph
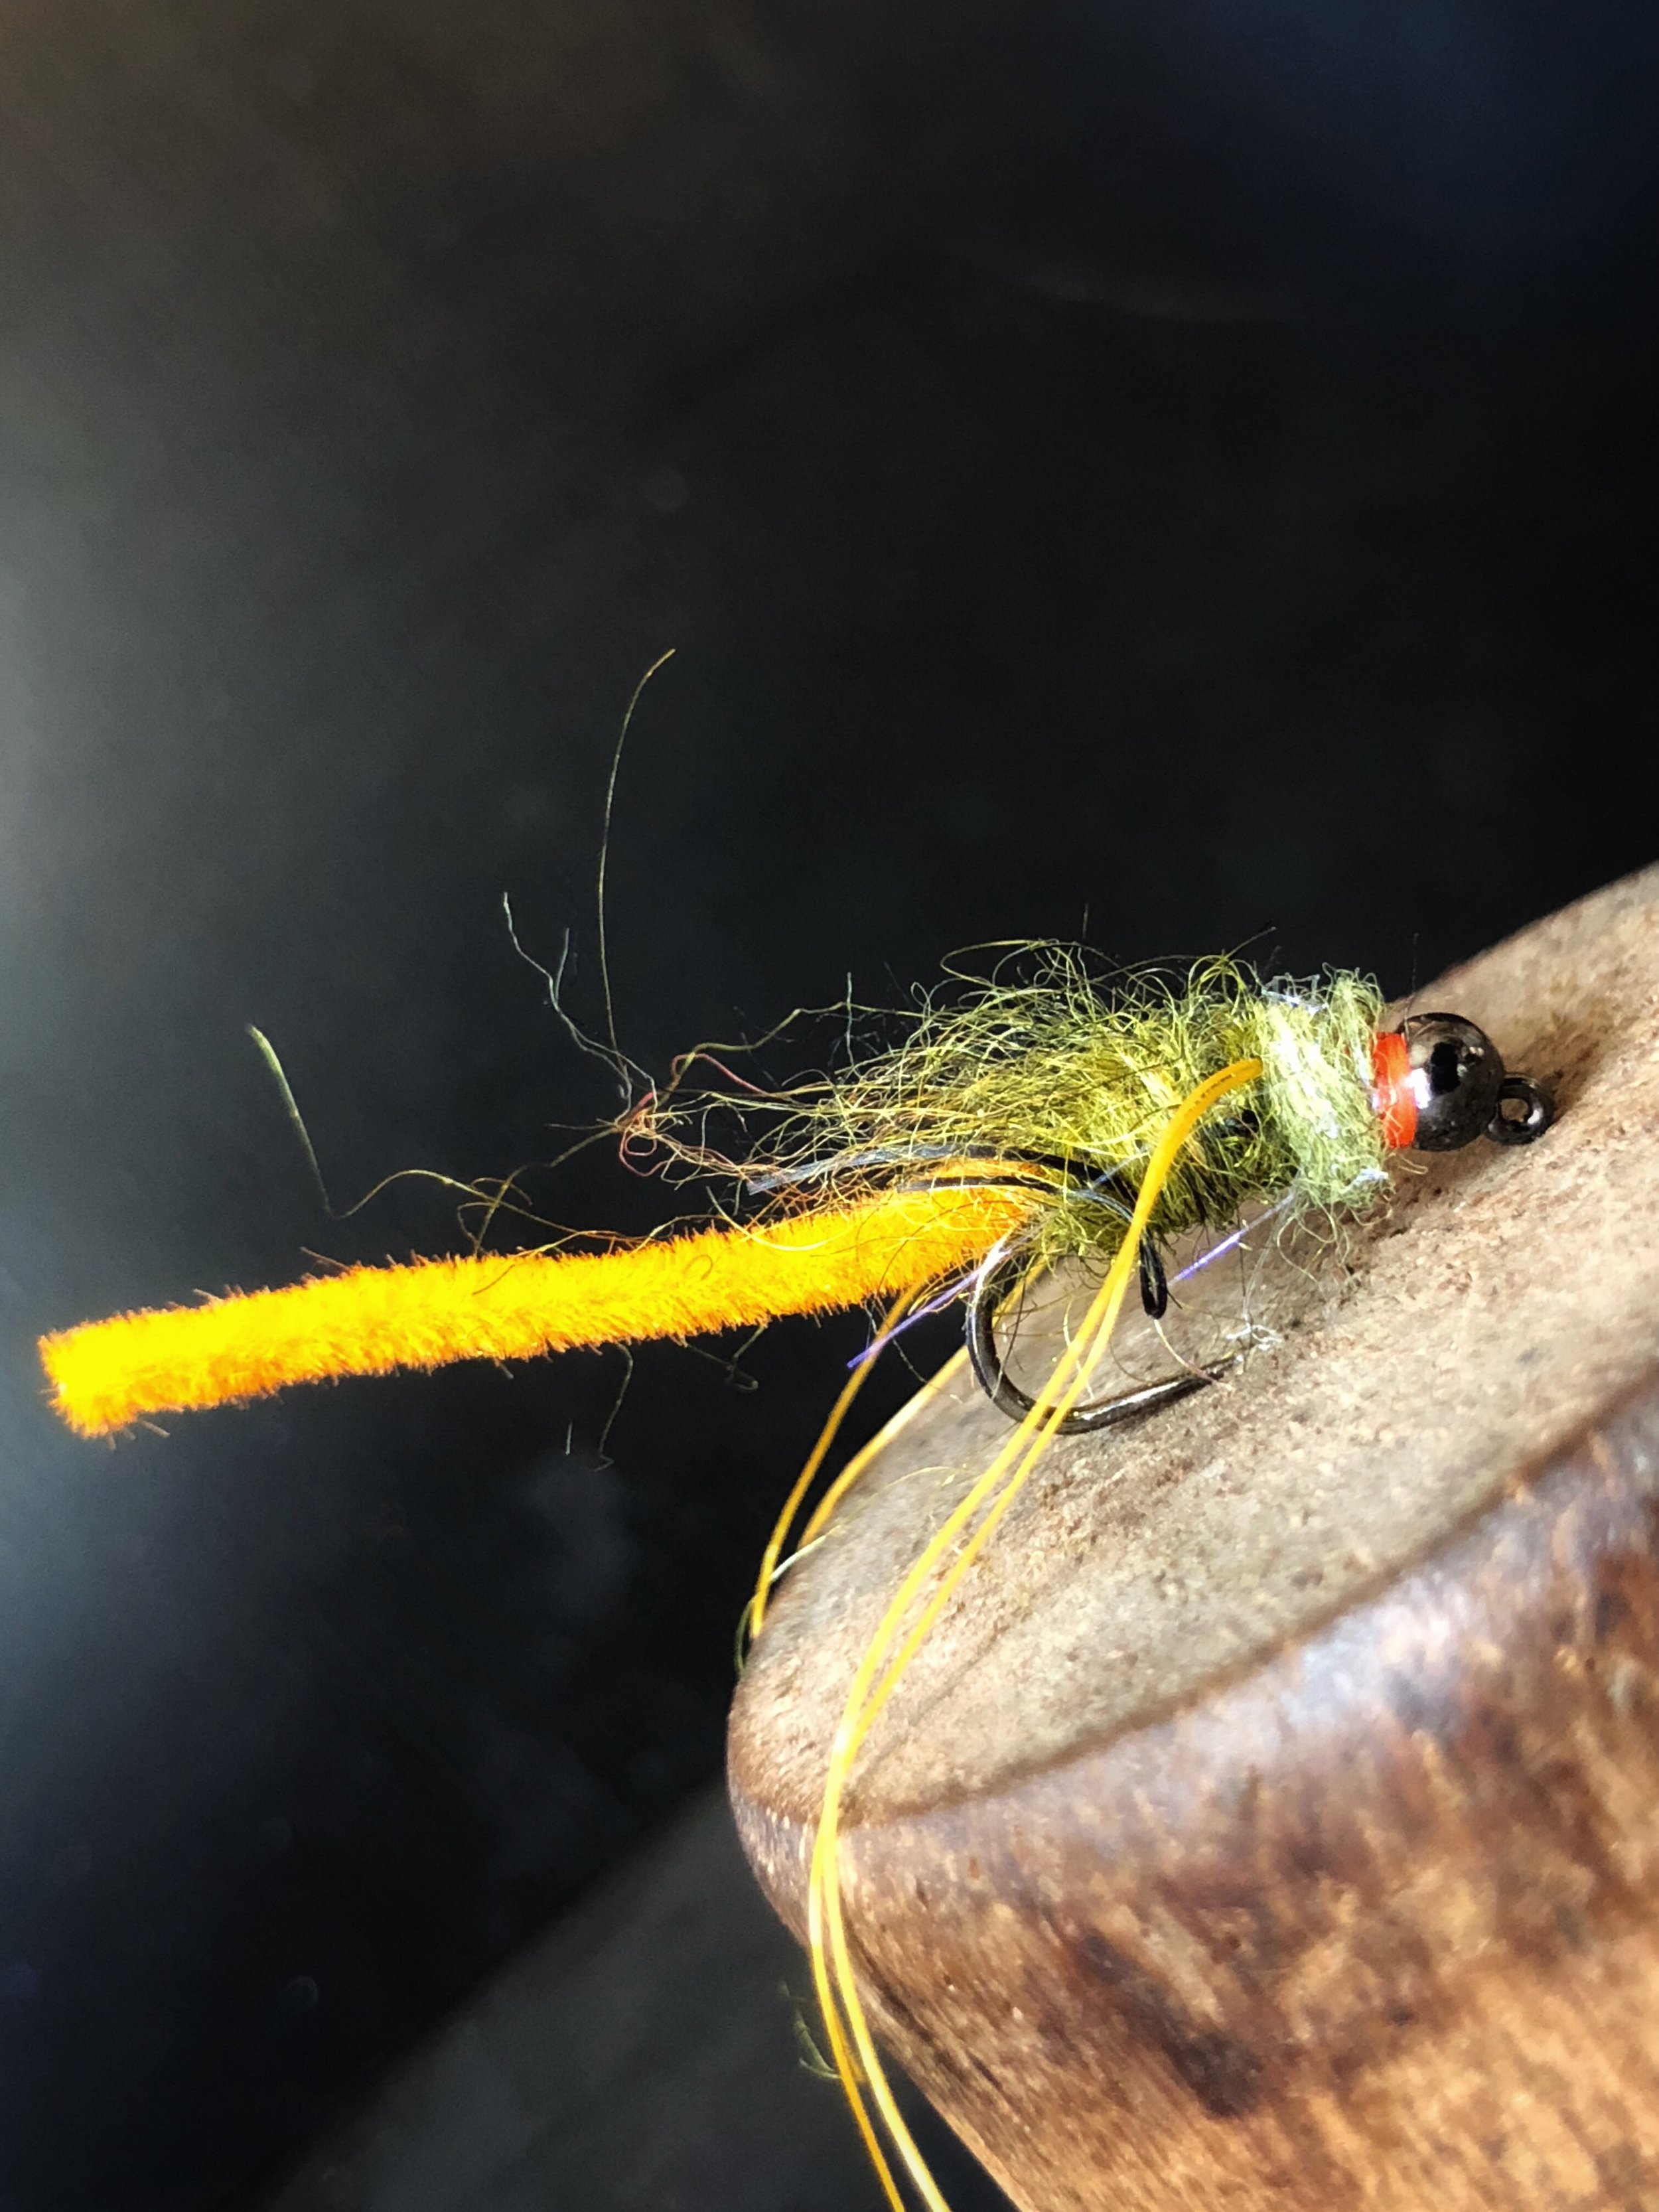
Pattern Submitted by Freddy Block
PATTERN RECIPE:
Hook: Size 14; 2X-heavy, 2X-long Nymph/Wet Fly (Dai-Riki 730; Daiichi 1710; Tiemco 5262; Mustad 9671)
Bead: 7/64" Brass (Black Nickel)
Weight: .015" non-lead wire [6-8 wraps]
Thread: UTC 70 (Black)
Tail: Krystal Flash (see "Color Combinations" below)
Abdomen: Ice Dub (see "Color Combinations" below)
Thorax: Ice Dub UV Black
Legs: Black rubber (Material was harvested from Walmart purchased spinner-baits for $1 USD ea. but any legs will be fine if the wiggle well!)
COLOR COMBINATIONS
Ice Dub UV Hot Orange & Krystal Flash (Fl. Fire Orange)
Ice Dub Chartreuse & Krystal Flash (Peacock/Pearl)
Ice Dub Hot Yellow & Krystal Flash (Olive)
INSTRUCTIONS
1. Add the bead to the hook and mount hook into your vice.
2. Wrap the wire onto the hook shank and then snug it up into the bead to push and center the bead toward the eye.
3. Start the thread behind the bead and wrap back to where the hook bend begins; then wrap back toward the bead until the thread is at the half-way point on the shank.
4. Tie in 4 strands of Krystal Flash keeping the material on top of the hook shank; wrap back to the hook bend. Trim the tail so it's just about a hook shank in length.
5. Dub the abdomen of the fly to be about 2/3 of the hook shank.
6. Now dub a sparse but tight thorax to the bead (leave room whip finishing).
7. Cut 2 lengths of the leg material. Each length should equal a finished leg length x2 (plus a little extra to be trimmed later to suit).
8. Put the material for one pair of legs (i.e., for one side of the fly) around the thread and get the two ends of it in your fingertips. Pull the legs away from the thread to stretch the material slightly and work it with the tying thread to position it on the side of the fly and near the back of the thorax. When you are happy with the placement, put a about 3 tight wraps around those legs to lock them down. Repeat the process to tie in the other pair of legs onto the opposite side of the fly.
9. Add more black dubbing to the thread and complete the thorax. As you dub the thorax (behind the legs and between them), be sure to get those legs positioned properly and ultimately, get the thread up to behind the bead.
10.Whip finish.
11.Trim the legs to even them; length is up to you.
12.Go fishing!
_________________________________________________________________
Brandon Creekbaum's Bugger Baum
Pattern Recipe:
Hook: Partridge Ideal Jig hook size 10
Bead: Tungsten size can be varied based on sink rate you are looking for.
Tail: Chenille in color of choice
Body: Hareline Carp Dub in color of choice
Legs: Micro silly legs tied in at thorax
Thorax: Olive Laser Dub
Instructions:
Step 1: Place beed on hook and mount hook in vise
Step 2: Tie in chenille along the hook shank. the Tail should be 2 times the length of the hook shank.
Step 3: Dub a body of Hareline Carp Dub on the rear two thirds of the hook shank
Step 4: Tie in the micro silly legs along each side of the hook
Step 5: Dub over the leg tie and point and up to the bead with the Olive Laser Dub
Step 6: Brush out dubbing with a dubbing brush
Brandon writes…
I wanted a buggy looking fly for panfish with great action in the water so I came up with the Bugger Baum. It’s tied on a Partridge Ideal Jig hook size 10, along with the tungsten bead which makes the fly sink quickly The Bugger Baum has a lot of movement in the water, and the panfish love it. Whether your jigging it on the bottom or striping close to cover this fly works great for blue gill and other panfish. Every time I go fishing for panfish this fly is always in my box!
_________________________________________________________________

The Baggenstoss Streamer
The name The Baggenstoss is in honor of my Great Uncle Herman Baggenstoss. Uncle Herman taught me how to fly fish. He worked for the National Park’s Service in the 1920s. During the Depression, he worked for the Civilian Conservation Corps and helped develop the South Cumberland State Park in Tennessee.
Tying the Baggenstoss:
Materials:
Hook: Size 8 Mustad 3366
Thread: 6/0 red thread
Upper Wing: Light yellow UV Ice Dub
Lower Wing: UV purple Ice Dub
Hackle: Lemon wood duck or mallard flank feathers
Eyes: Bead chain
Step one: Start the thread and tie in the bead chain about 1-1.5 eye lengths behind the eye.
Step two: Tie in the wing midway between the point of the hook and eye. Yellow on top and purple on the bottom (it will ride hook up).
Step three: Select a flank feather, pull the fluff and barbs off to the thinner part of the quill. Tie in the flank feather tip first, just ahead of the wing.
Step four: Fold the feathers together and palmer forward.
Step five: Whip finish and apply Solarez Bone Dry to thread. Cure with UV light.